Guides · Planning a Trip
Planning a trip in the web app.
Start with the fundamentals from wilderness guide Matt Kessler, then follow along as I plan a real, ambitious off-trail route in the Eagle Cap Wilderness — rough idea to finished plan.
Start with the fundamentals
First, the framework I use on every trip.
Before I get into how I plan a more ambitious off-trail trip, watch Matt Kessler’s walk-through. He’s a wilderness guide, and he lays out a framework I use on every trip: pre-plan the route, pre-navigate it in your head, and pre-communicate it to the people coming with you and the people back home.
This is video 1 of Matt’s three-part series. Watch all three videos → Everything below is me taking that framework and pushing it about as far as I do — planning a route that spends most of its time off-trail, high on the ridgelines.
Before we start
A word on off-trail travel.
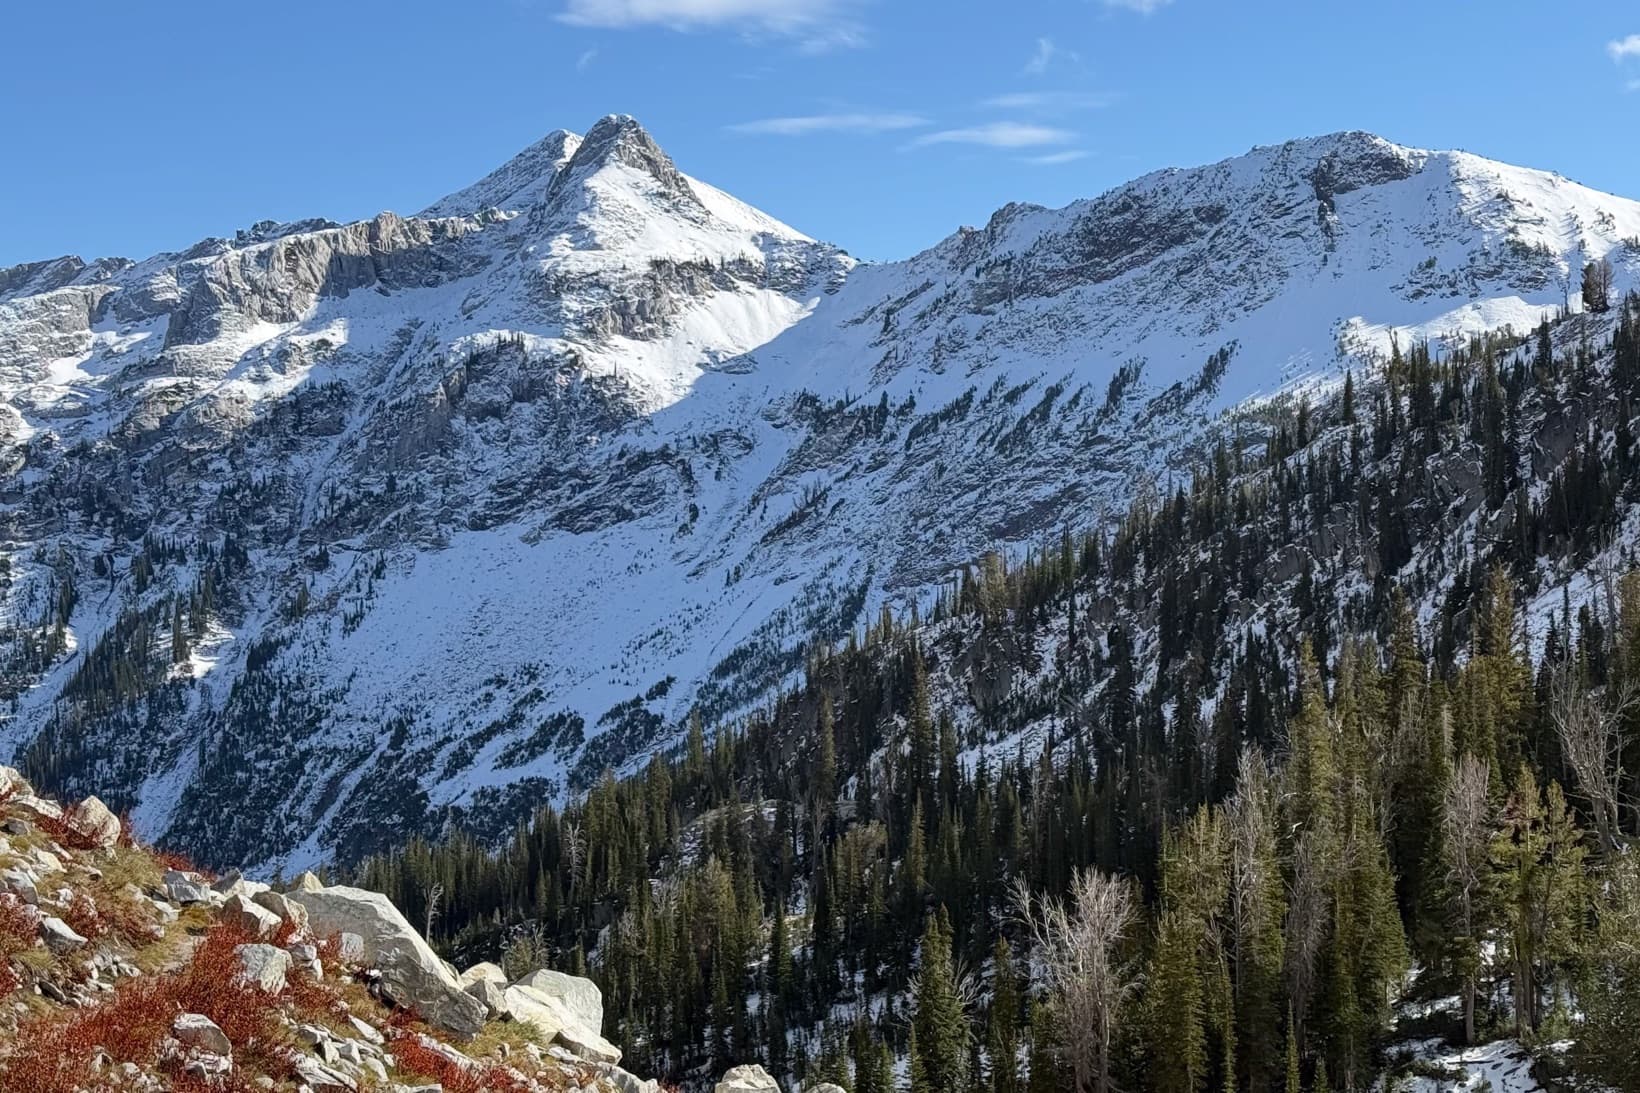
For the Eagle Cap I wanted to travel as much as possible high on the ridgelines, off-trail. I’m very comfortable with that, but it takes a different mindset, and it changes how you plan.
I go in expecting it to be much more challenging, mentally and physically. It’s surprising how exhausting — and exhilarating — it is to navigate all day off-trail. You have to stay on top of your game; you never get to switch your brain off and just pound out miles the way you can on a trail like the PCT. I treat it like an expedition: the joy is in the traveling, not the destination. I’m completely okay turning around before reaching a goal. Sometimes I’ll drop my pack and scout ahead to find a safe passage. It isn’t about racing to camp — it’s about slowing down, savoring it, and staying engaged with the terrain. I’ve been more wiped out after five miles off-trail than after eighteen on the PCT.
If you haven’t done much off-trail travel, start small: a short route on an open ridgeline where it’s hard to get lost. Bushwhacking for hours is disorienting and not much fun. One of my favorite starter routes is the Citadel Loop — you can even begin with just the off-trail section from Circle to Spade and skip the ridge above Deadhead to Lake Vicente until you’re ready.
Step 1
Start rough.
I start by getting a general idea of how the trip could come together. I’ll have a handful of places I want to camp or explore, and I trace rough routes between them just to get a feel for distance and total elevation. I’m not trying to be precise — I want a sense of scale. Sometimes a route looks amazing, then I trace it and realize it’s twenty miles, all off-trail. Nope — that’s two days. At this stage I’m not worried about exact lines, just a rough shape.
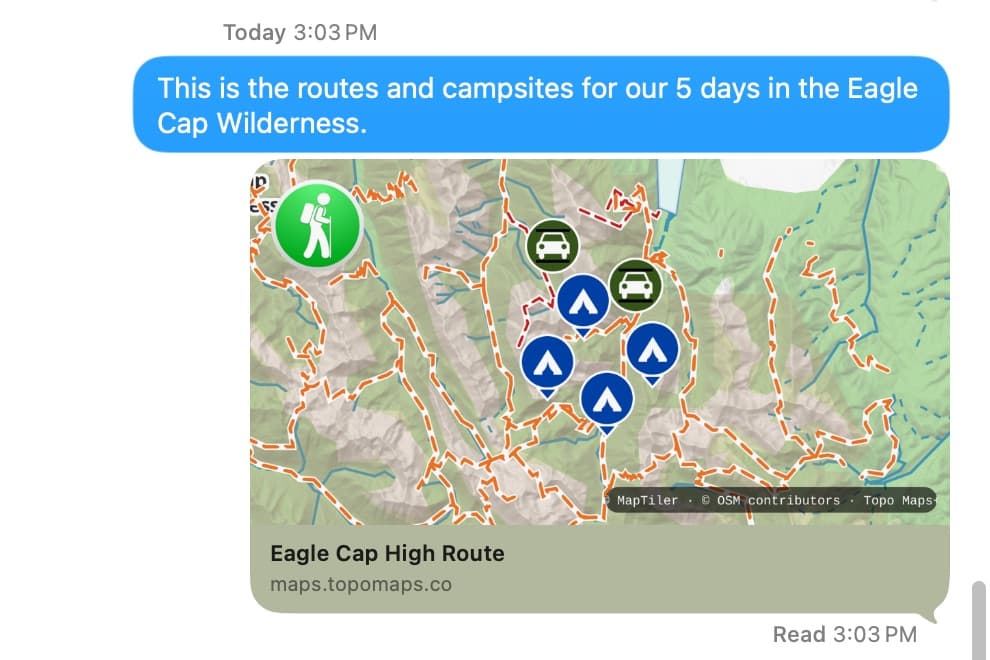
For this trip, I knew I wanted to visit Honeymoon Basin, climb Cusick Mountain, stay high above Frazier Lake instead of dropping to the trail, and find a way from the Lakes Basin to Ice Lake without descending into the valley.
Step 2
Research real routes.
Then I research real routes for the off-trail sections. I often look for routes to peaks — sites like Peakbagger usually have them. The final summit pitch is frequently too technical for me, but the approach is exactly what I’m after.
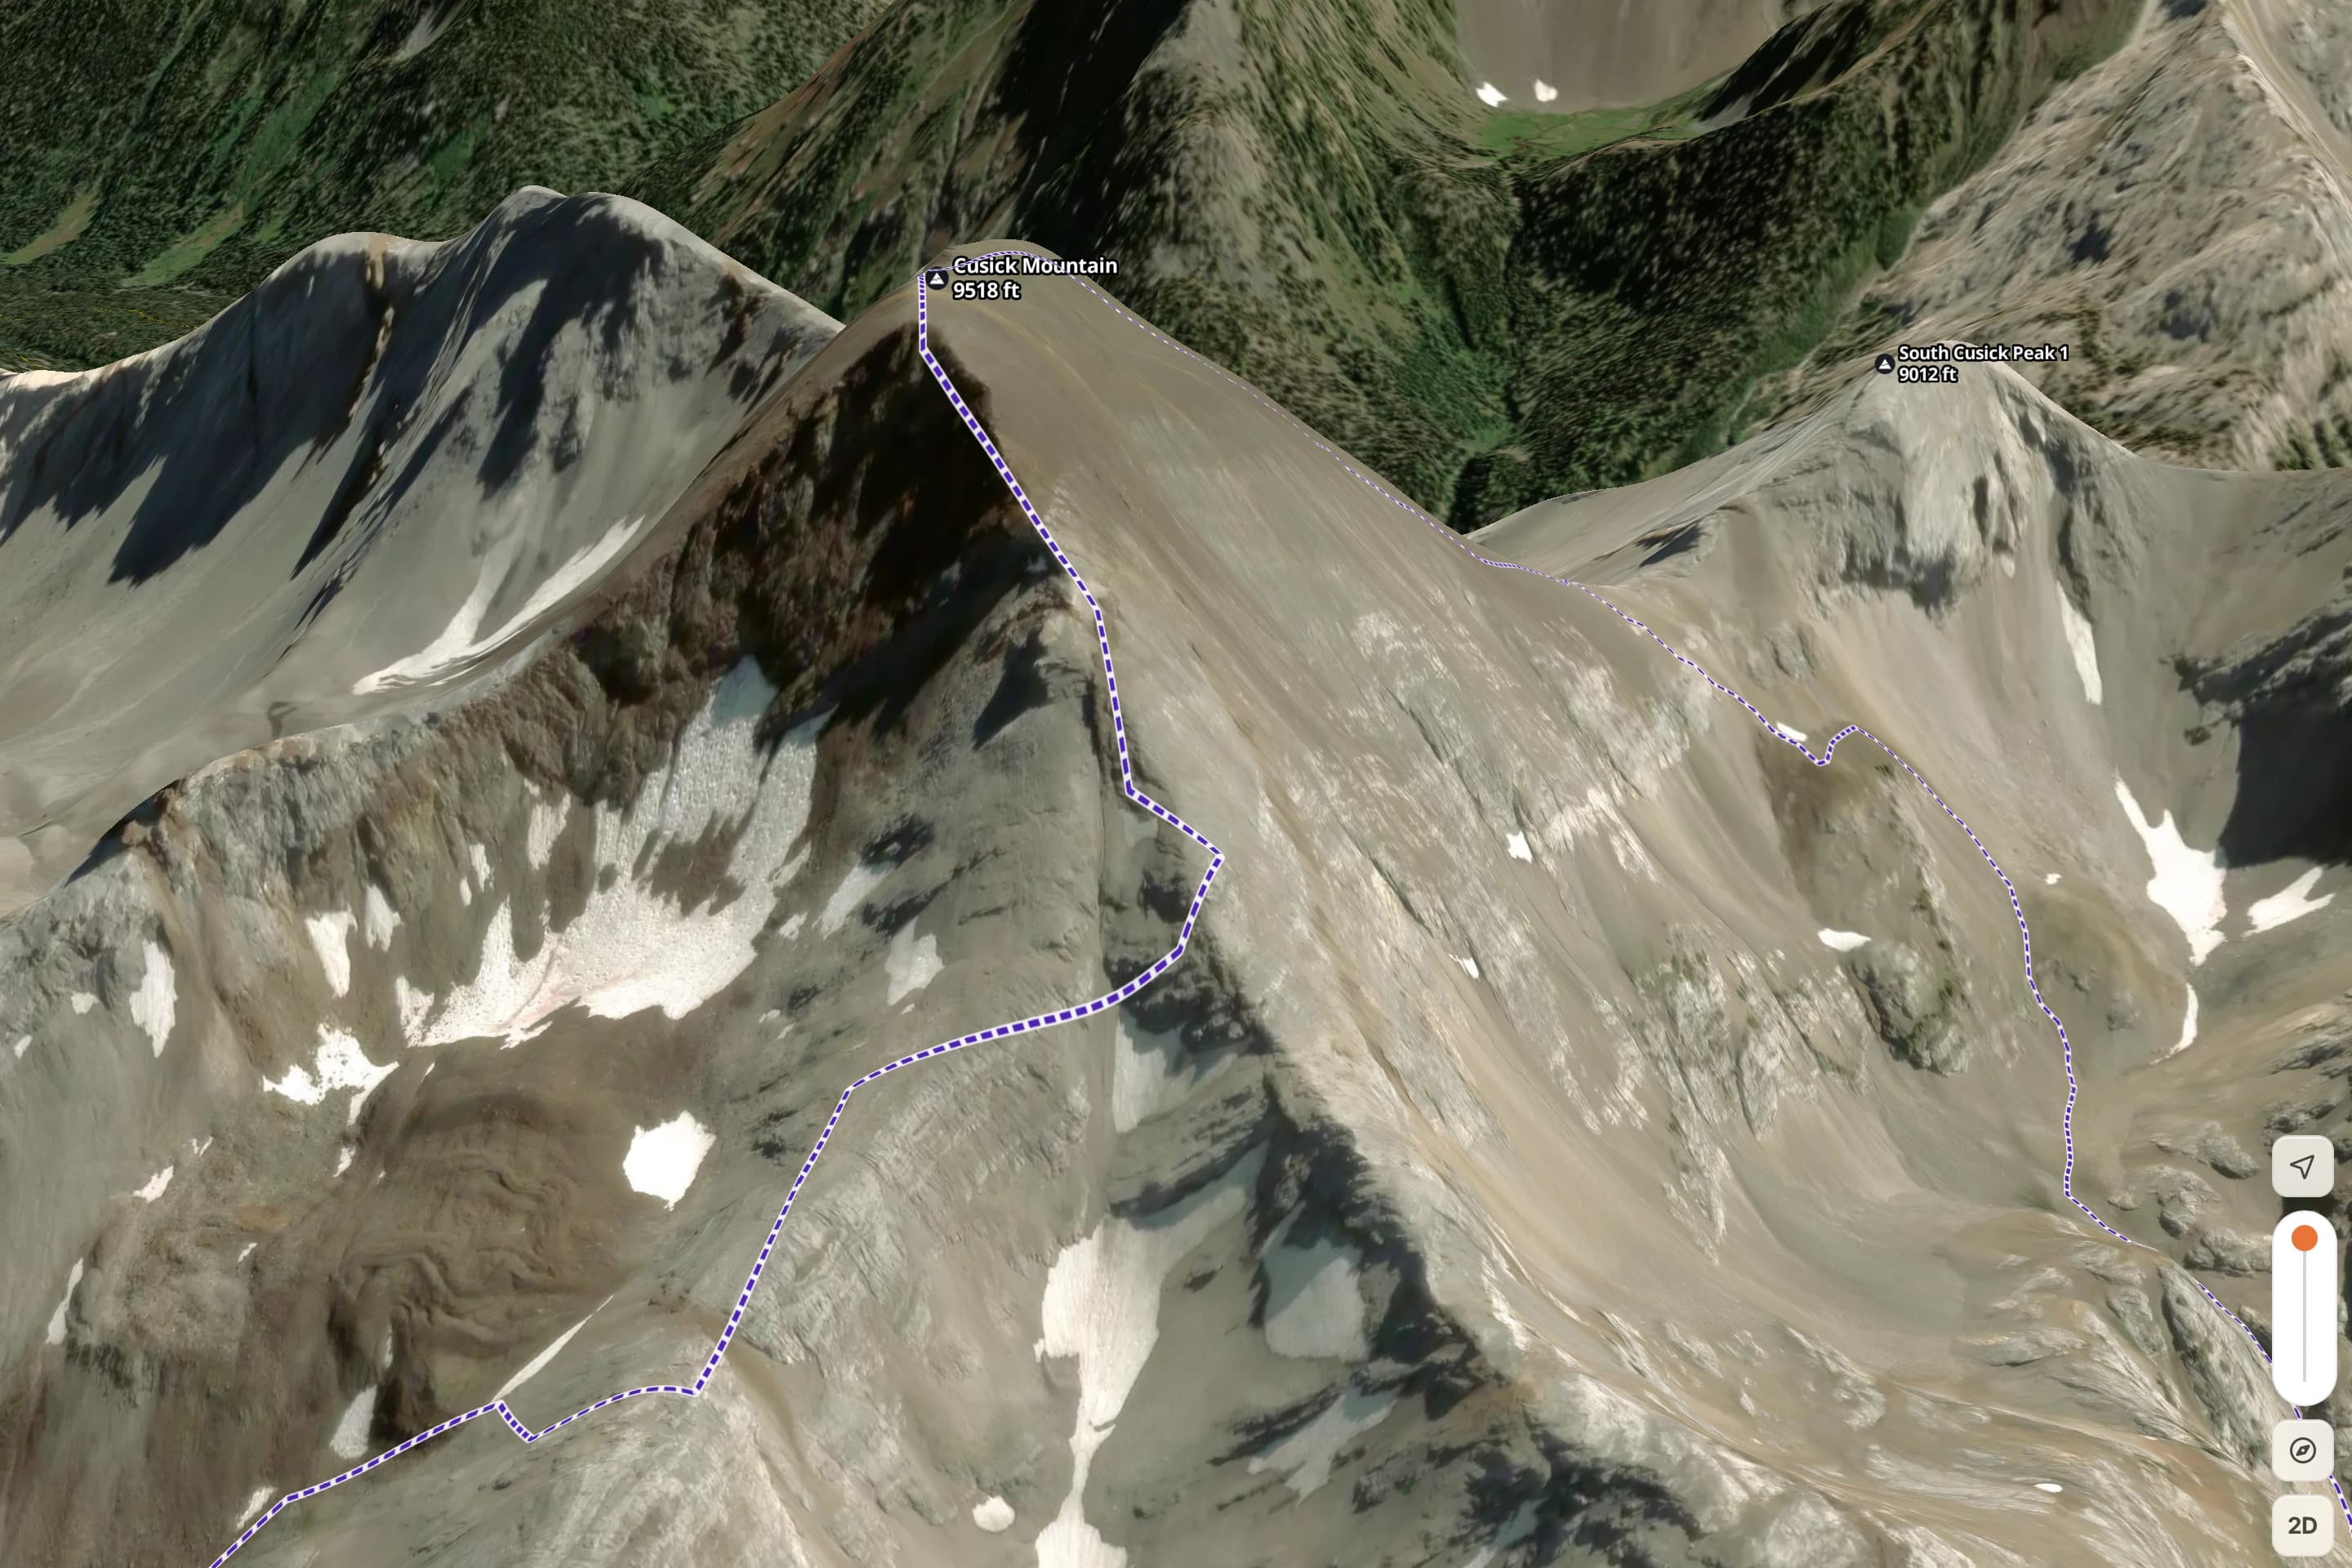
Here’s why the research matters: the map hides things. I thought I could go up Cusick Mountain’s NE ridge — on the map the spur looks like a walk-up. But maps don’t show you twenty-foot cliff bands. I found a post on oregonhikers.org from someone who tried that NE spur and cliffed out; a comment pointed to a better line up the NW spur out of Honeymoon Basin, and linked to Christof Teuscher’s route from his astonishing “Eagles 33” challenge (he did it in 104 hours). I imported his GPX track into the web app, then imported other tracks I found for the ridge and peak sections. Once I had imported routes covering all the off-trail parts I wanted, I was ready to build.
Step 3
Build the route.
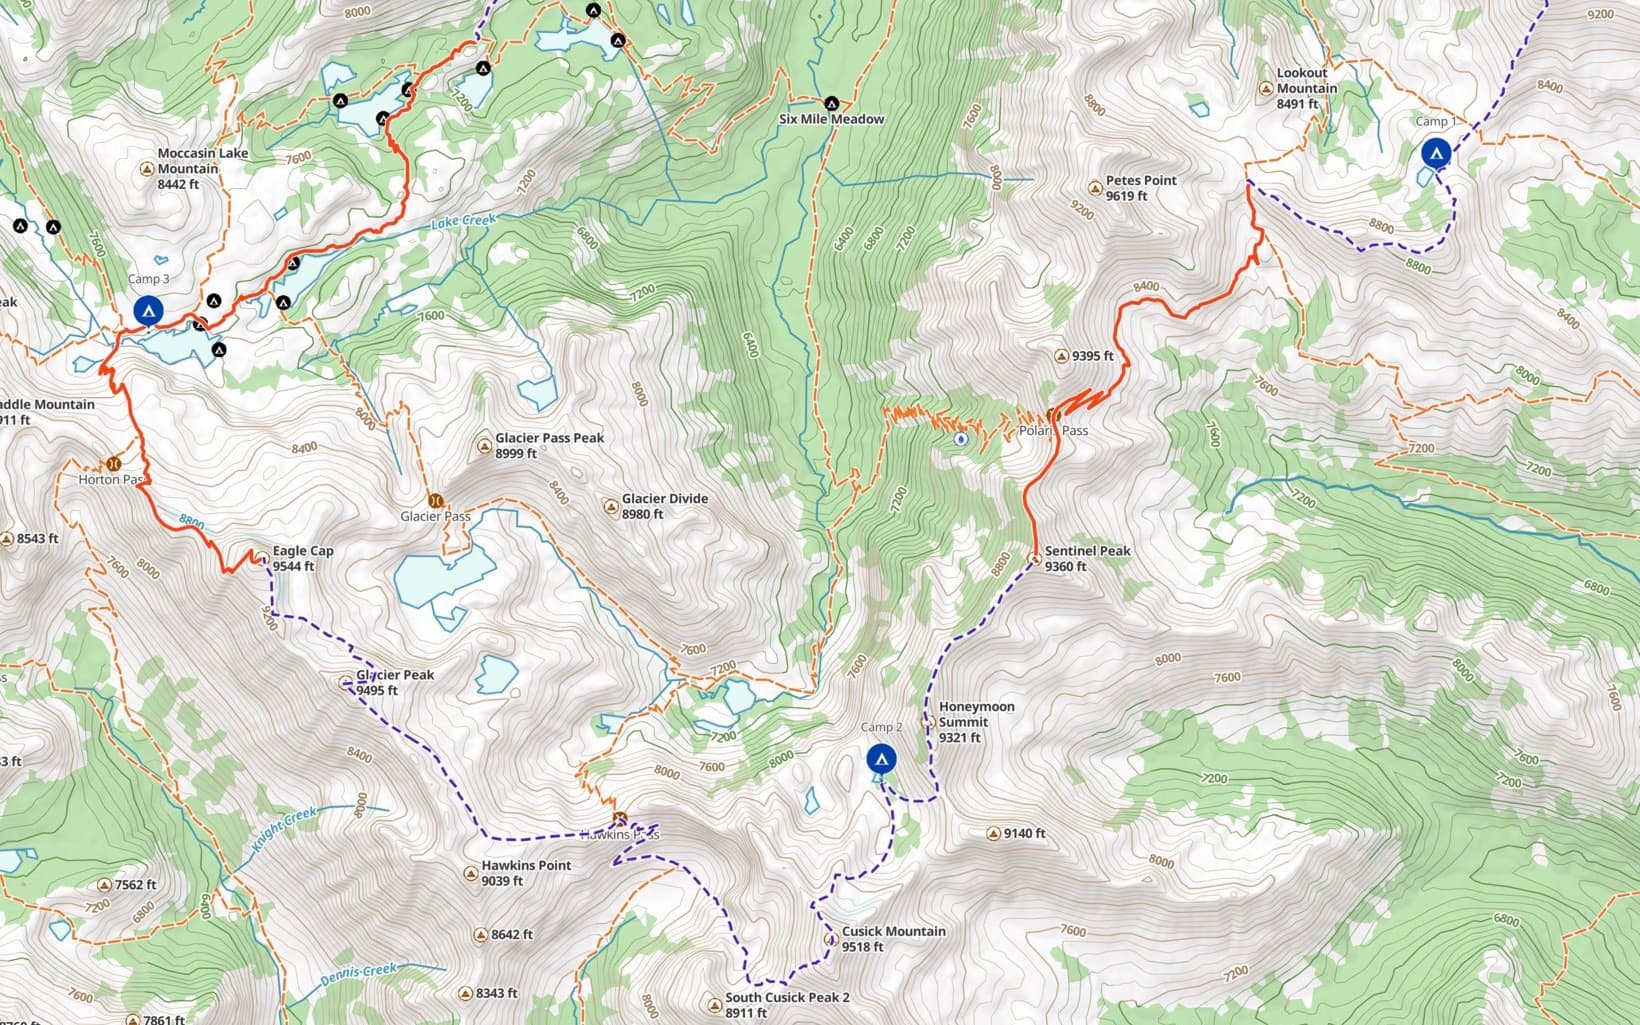
With the real routes imported, I assembled the trip:
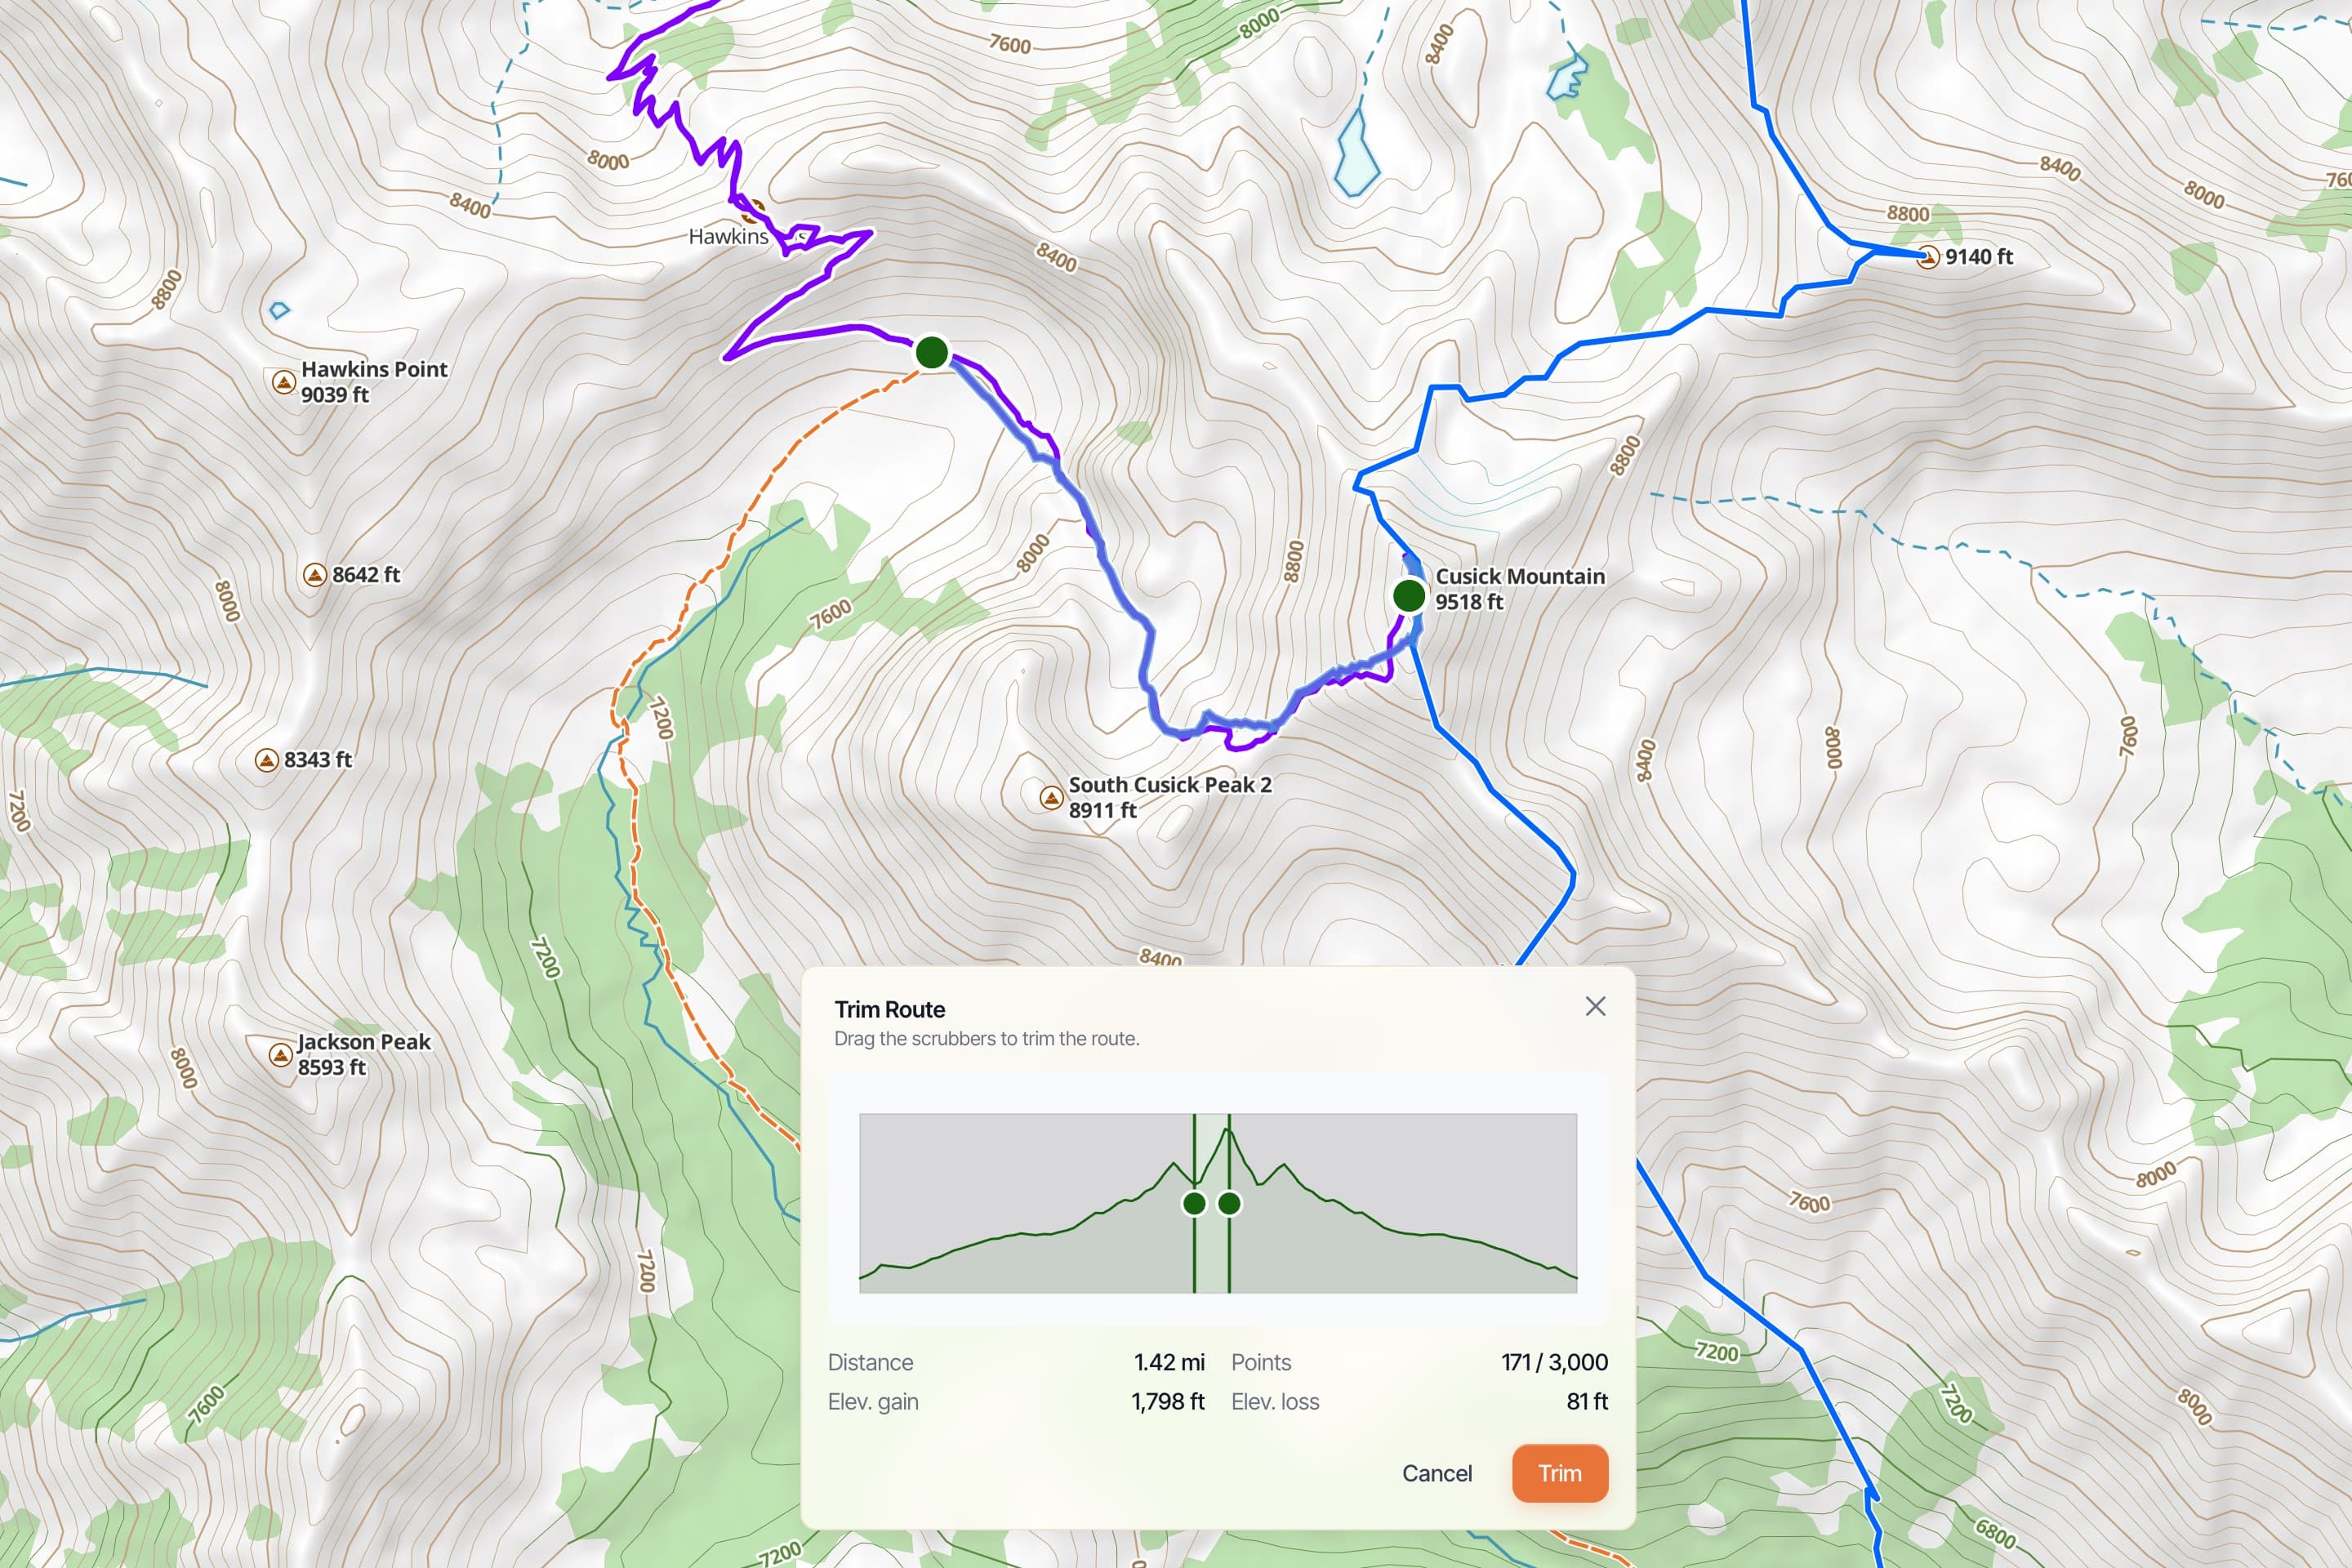
- Edit and clip the imported tracks down to just the sections I actually wanted.
- Add the on-trail connections with Snap to Trails.
- Drop a waypoint at each campsite.
That mix — imported off-trail lines, snapped on-trail links, and camp waypoints — is the heart of the plan.
Plan your outs, and your backup camps. As I build, I pay close attention to the easy trail down the valley — the walk-out. Every campsite I pick has a way to reach that trail. And for the few off-trail sections I’m not sure about — the ones that might be beyond my technical ability — I make sure there’s a way to bail out and drop back down to the trail. It might add a few hours to the day; that’s fine. It’s the same instinct Matt describes when he marks a bad-weather “ditch point”: know your out before you need it. I also try to camp just below a big climb, not above it, so I take the pass rested and early the next morning instead of grinding over it tired at the end of a day.
One more thing belongs right here: off-trail, you have to keep “enough gas” in the tank. You can’t push to the breaking point, because that’s exactly when you make bad decisions. The best insurance is boring — regular exercise, so you’re ready for long, awesome days in the mountains and still have margin when something goes sideways.
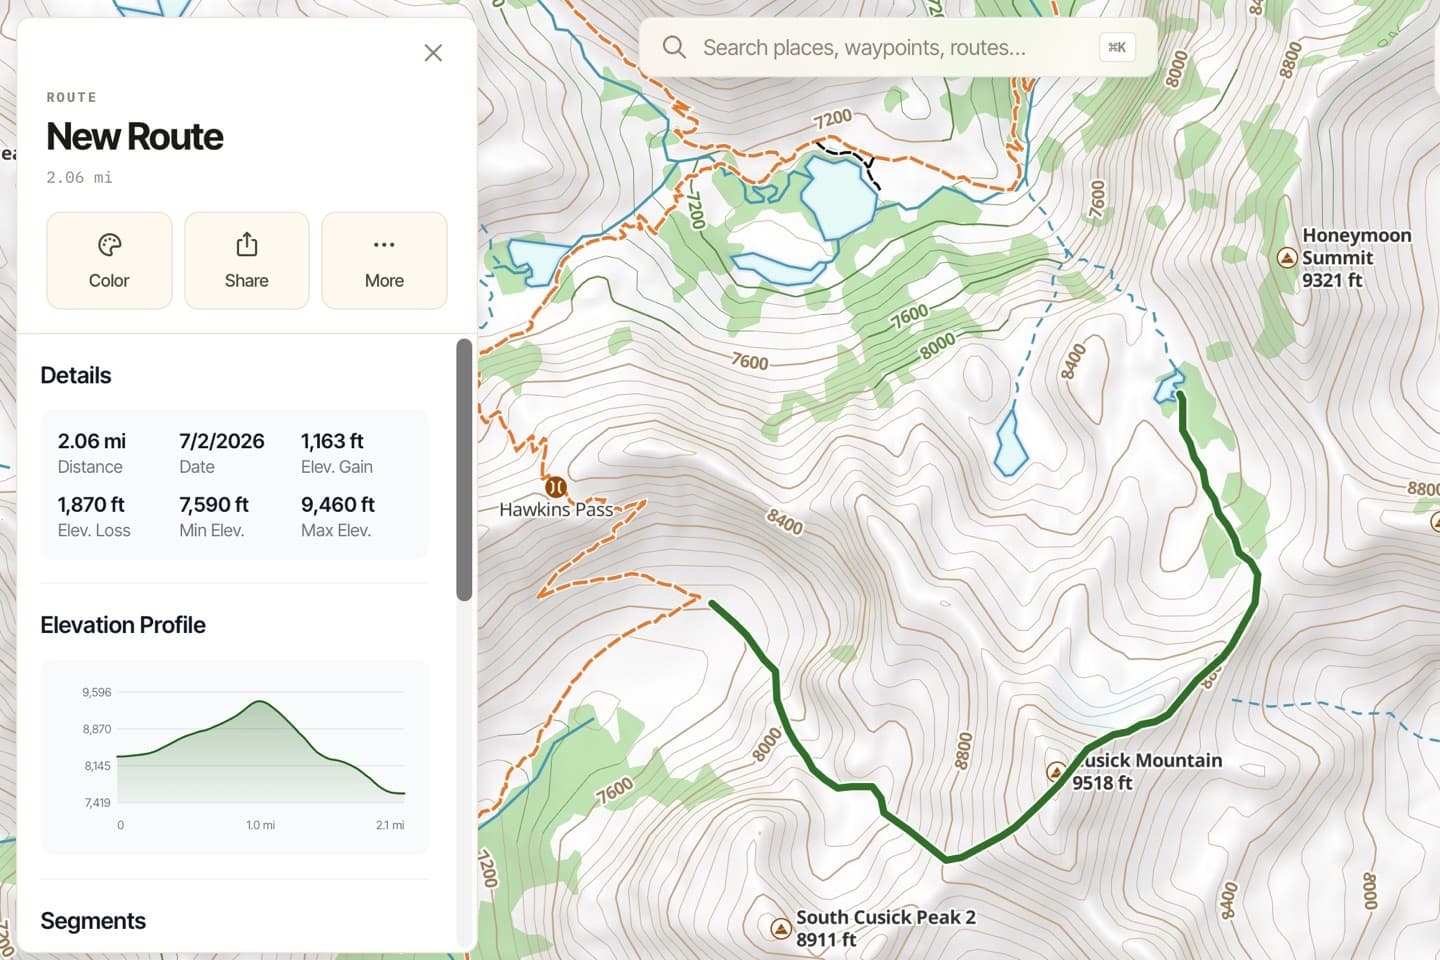
Check the effort, segment by segment. I break the day into its on-trail and off-trail pieces and look at the distance and elevation for each, making sure every piece is something I’m genuinely comfortable with. Click a segment in the web app and you get the exact distance and gain — “6.5 miles, 2,900 feet” is a very different day than the “seven miles, that’s not bad” your brain guessed. I pay special attention to any extended stretch running 1,000 feet of climbing per mile — I know my body, and I know how much of that I can do, and for how long.

Step 4
Share, and communicate the plan.
First, I share the trip with the friends coming along, and they always have suggestions. Each round, I go back in, edit routes, sometimes delete a line and re-trace it. Planning a route like this is never one-and-done — it’s a few passes of refining, and everyone coming on the trip gets the full route details.
But sharing isn’t only about feedback — it’s a safety net. This is Matt’s third movement, pre-communicating the plan, and it’s one I take seriously. Before I leave, I leave a printed map at home and make sure the people staying behind know the plan: here’s where we start, here’s the route, here’s where we come off the trail. That clarity reassures the people at home far more than “it’ll be fine” — it shifts the story from “he’s disappearing into the wilderness” to “that’s a solid plan.” In the web app, a shared link opens as an interactive map anyone can view without the app, and you can export a Printable Map — which is exactly the copy that ends up on the kitchen table at home.
Want the paper backup done right? See our guide to printing a paper map →
Step 5
Pre-navigate in 3D.
Finally, I want to see the hard sections before I’m standing under them. I use the 3D map in the web app to fly the ridgelines and route lines — it’s the mental rehearsal Matt talks about, and it’s genuinely reassuring to have walked the route in my head before I walk it with my feet.
Everything lives in my account, so the finished plan is already synced to my phone and watch for the trip. No exporting, nothing to remember.
The finished plan
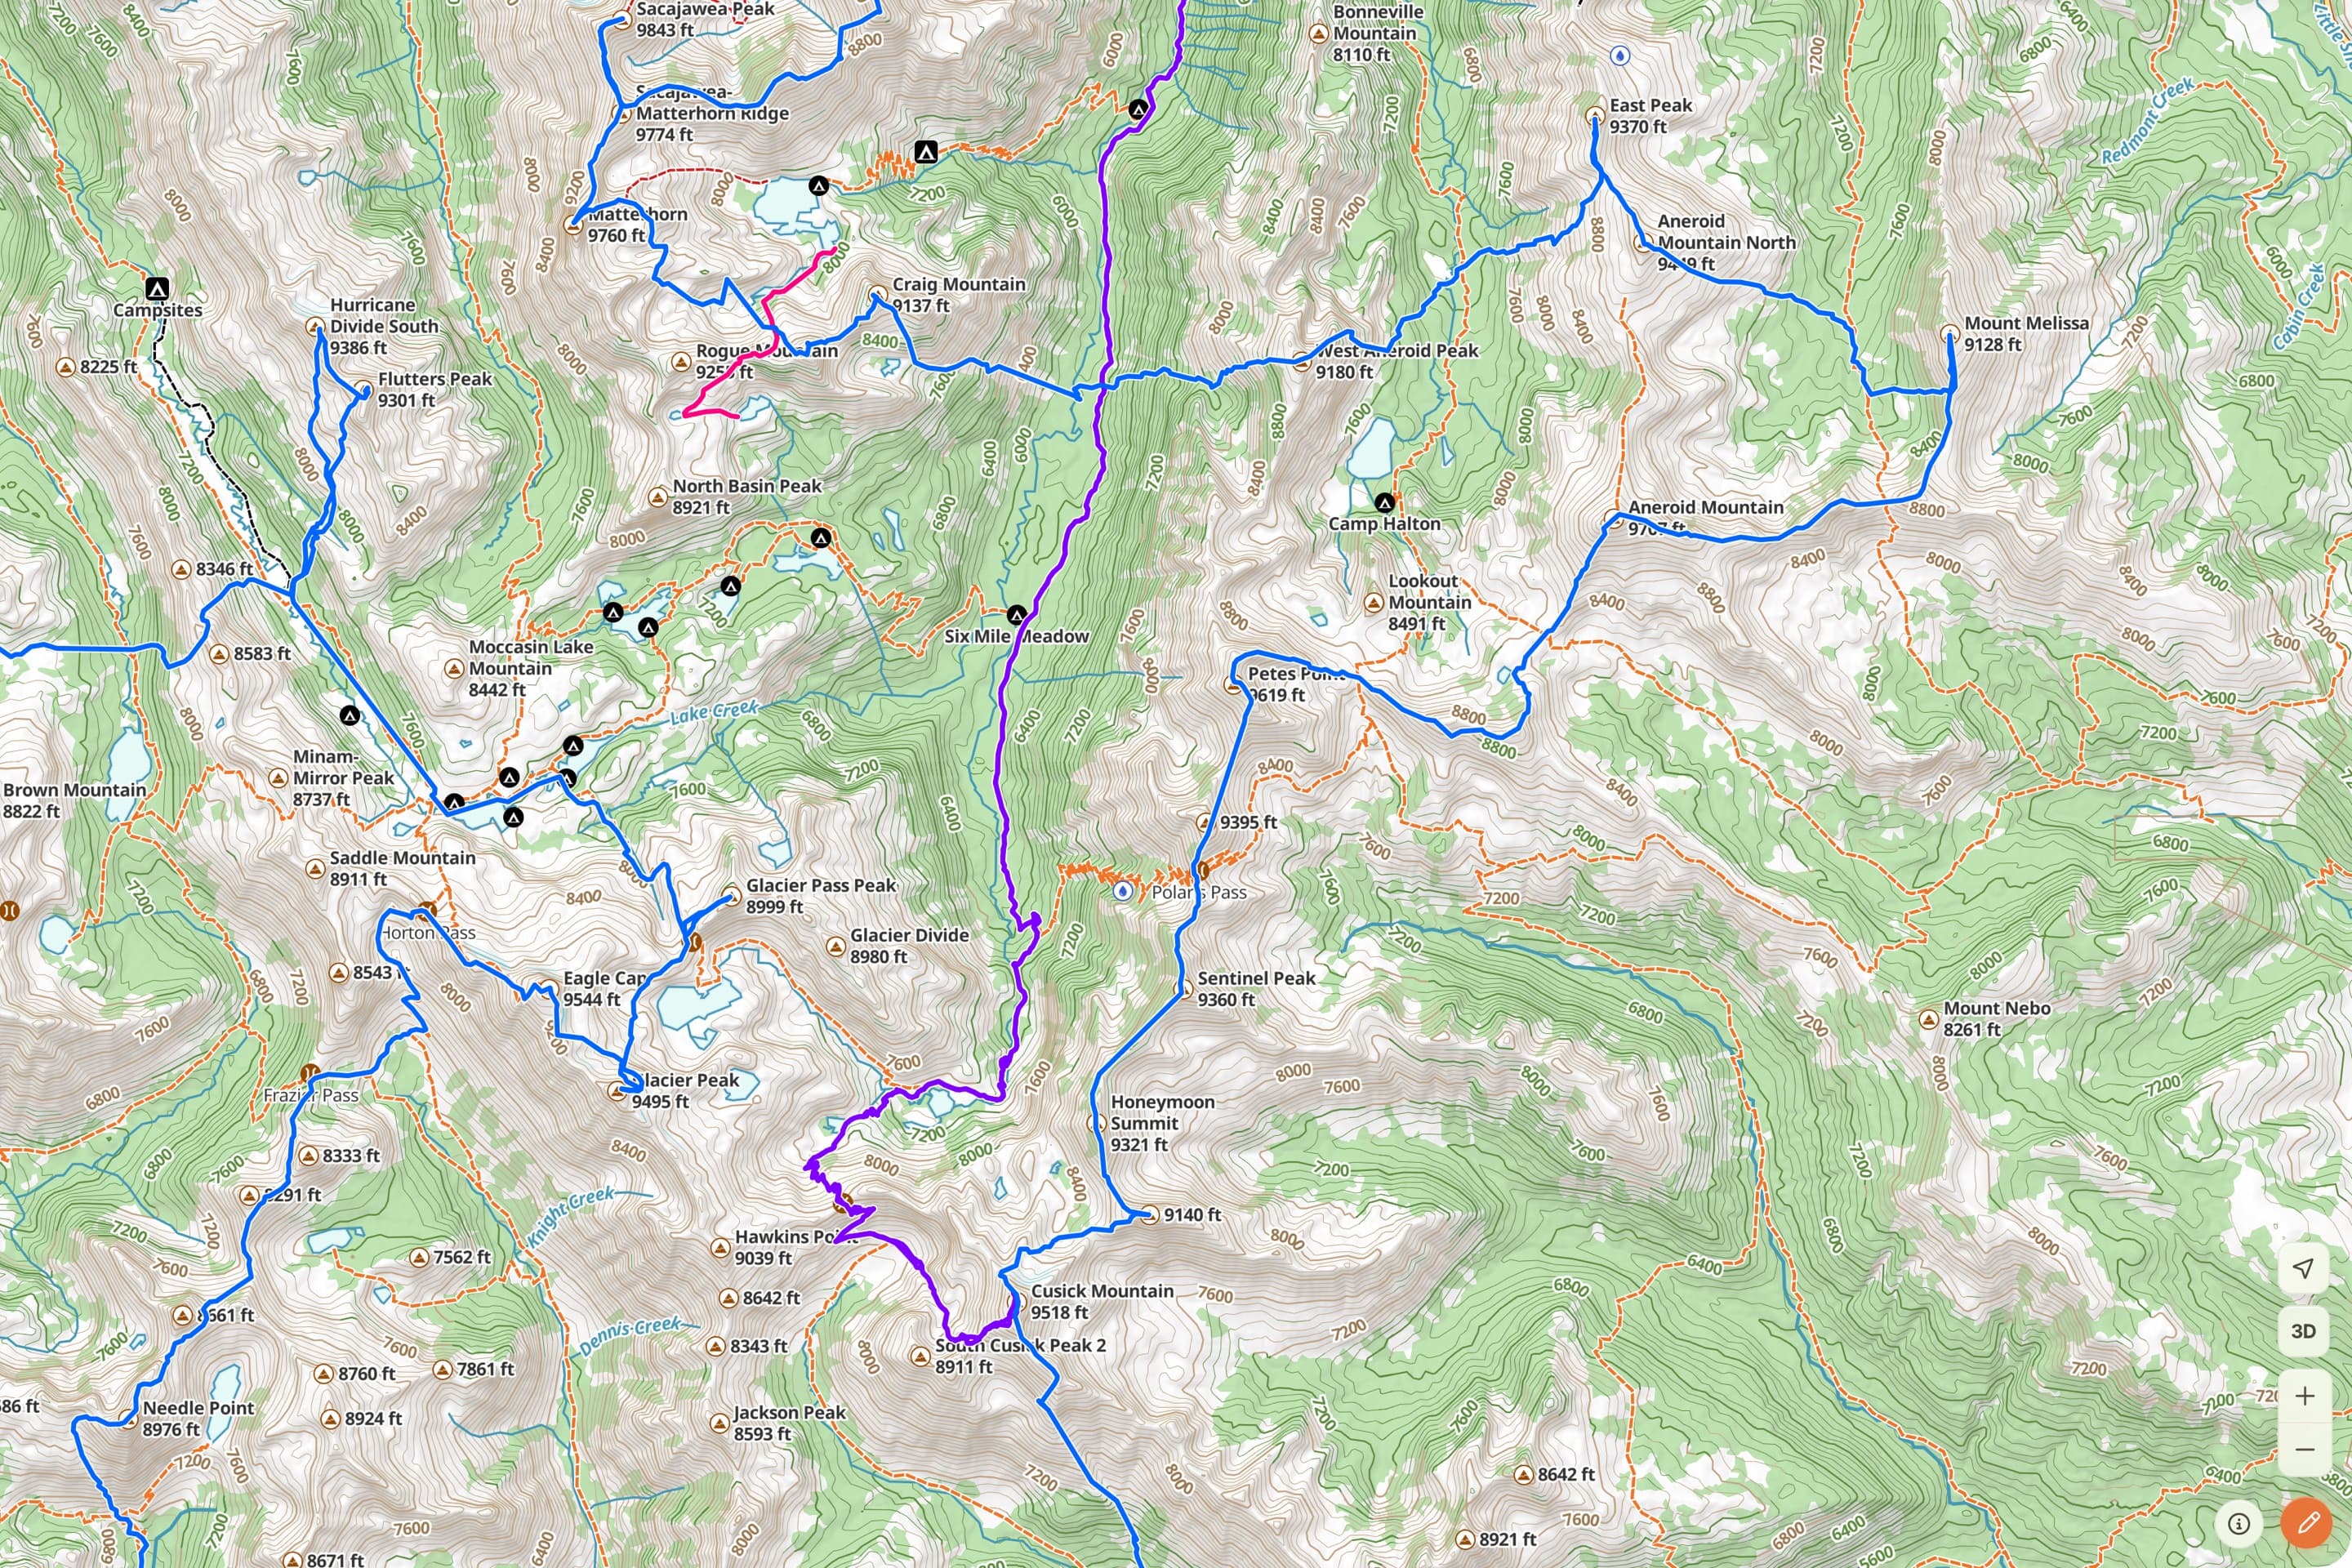
Here’s the whole trip.
All of it together — the imported off-trail lines, the snapped on-trail links, and a waypoint at every camp. Open the shared link and explore the full route yourself.
That’s the plan. But a plan is only ever half of it — once I’m out there, following it is its own skill. When the terrain doesn’t match the line or the weather turns, I fall back on the same three questions I answer on every trip: the navigator’s mindset →
This is a personal trip plan shared for inspiration, not a recommended or maintained route. Much of it is off-trail and crosses serious terrain that demands real route-finding, fitness, and judgment. A shared line can’t show you cliff bands, snow, or weather, and conditions change constantly. Evaluate the terrain yourself, carry the skills and gear for backcountry travel, and go at your own risk.
Try it
Plan your next trip.
Everything here happens in the Topo Maps+ web app — free to try in your browser, and synced to every device you own.