
Data Layers
Data layers let you build custom map visualizations from attributes you define. You set up an attribute schema (the information you want to track for each map object), then add style rules that change how objects look based on those attributes.
How to create a data layer
-
Tap the Maps button in the toolbar.
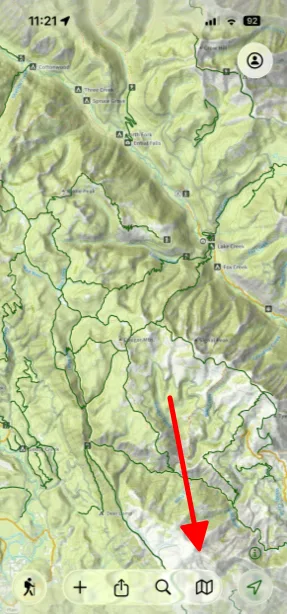
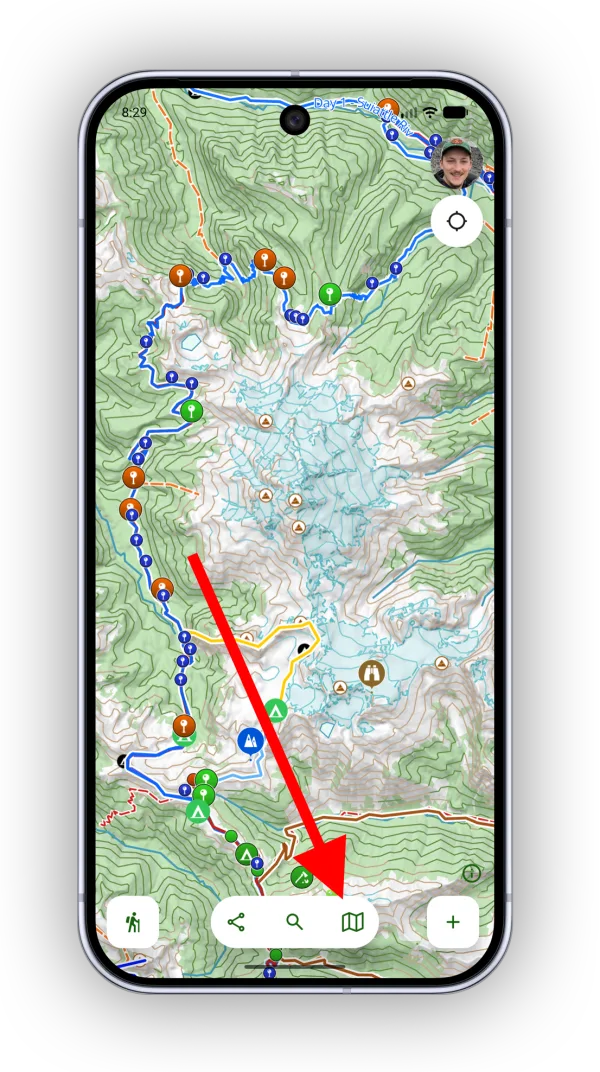
-
Under Data Layers, tap Add, then tap New Layer.
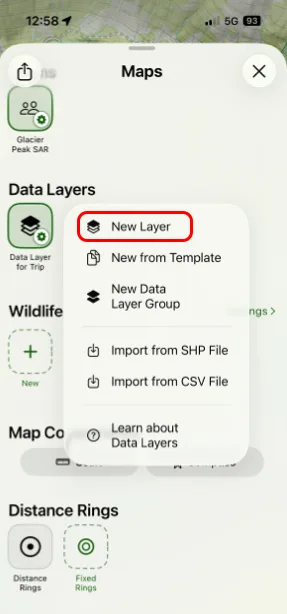
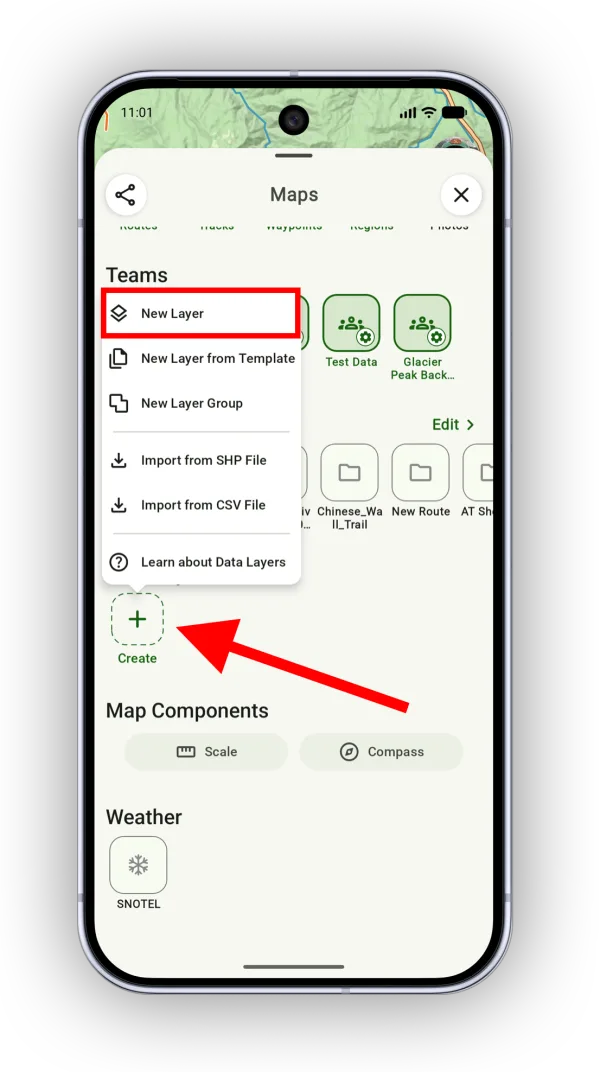
-
Give your data layer a title and tap Done.
How to define the attribute schema
An attribute schema defines the information you want to track for each map object in the layer. For example, if you're mapping hiking trails, you might track difficulty, surface type, and trail conditions.
-
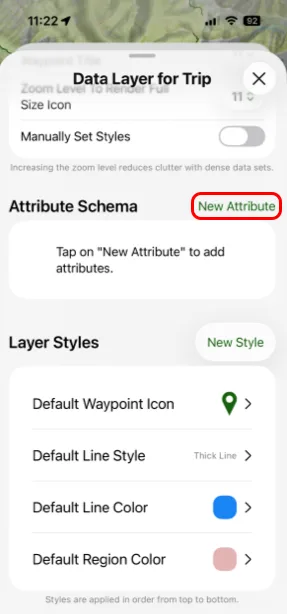
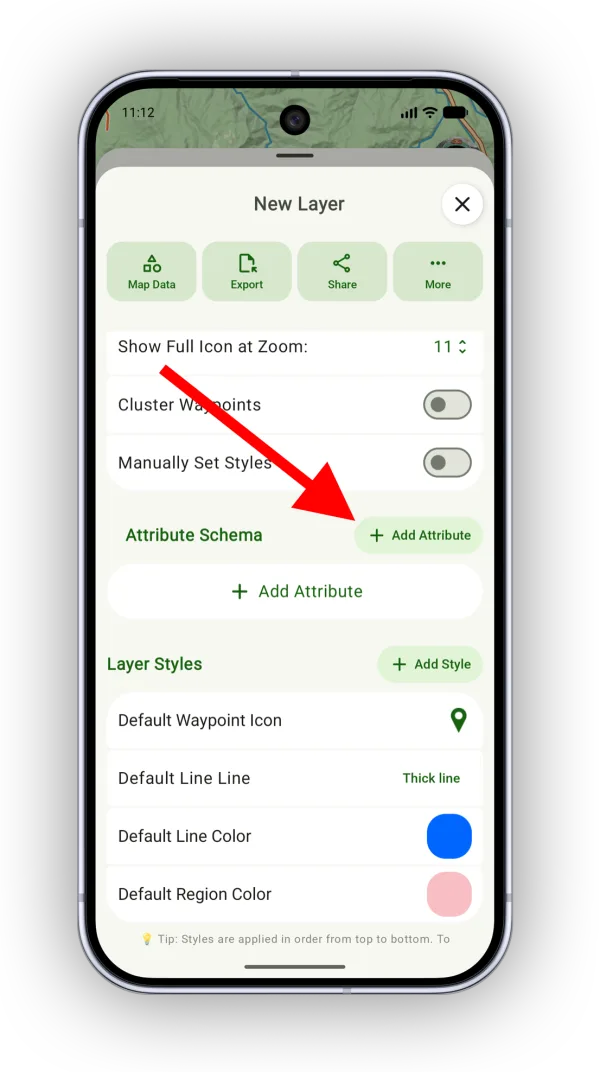
In your data layer, tap Add Attribute.
-
Give the attribute a title and pick an attribute type, such as text, number, date, photo, or true/false.
-
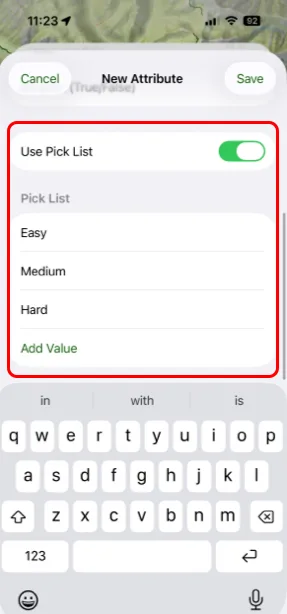
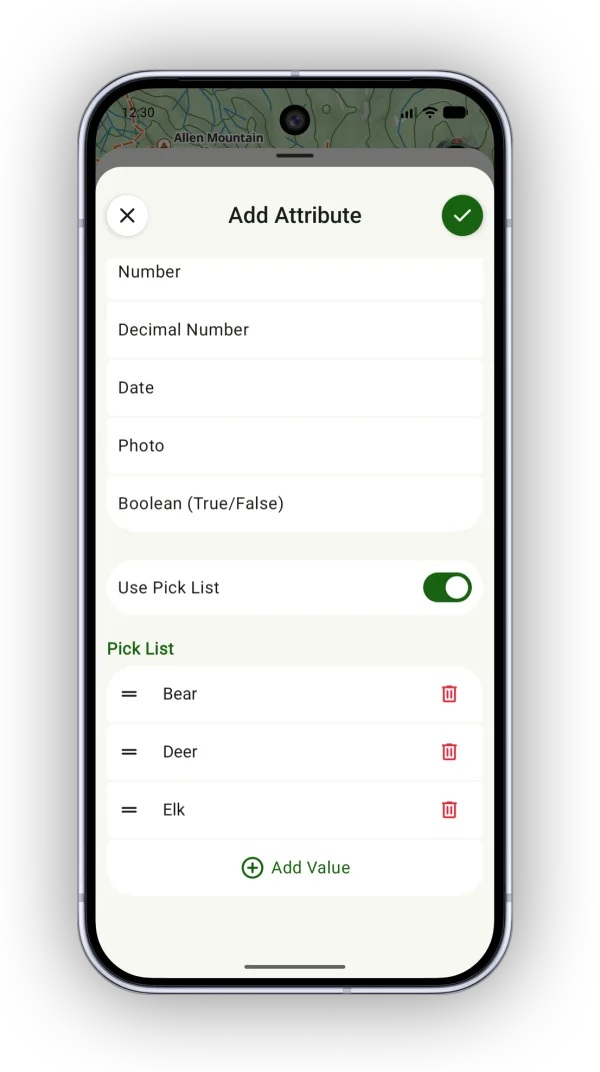
Optionally, turn on Use Pick List to give the attribute a set list of values to choose from, such as Easy, Medium, and Hard.
How to add style rules
Below the attribute schema are the layer's styles. Style rules change how objects look based on their attributes. Styles apply from top to bottom, starting with the default style for each type. Tap a style to edit it.
-
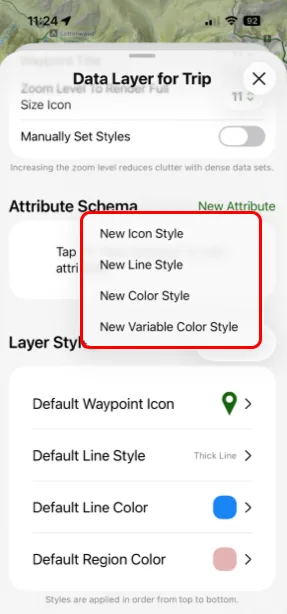
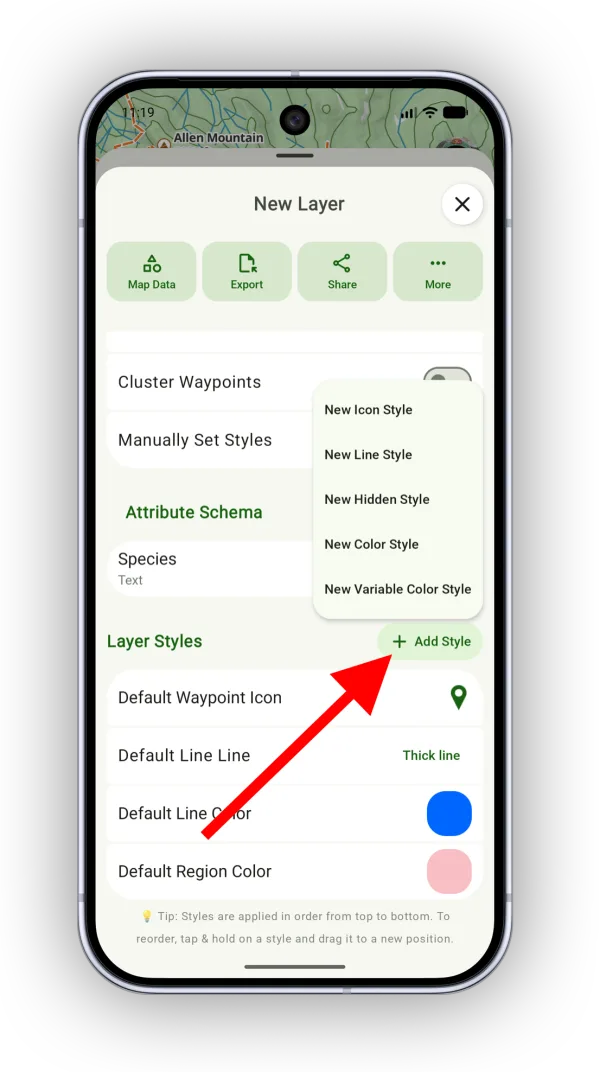
Tap Add Style and choose the type of style:
- New Icon Style: Styles waypoint icons.
- New Line Style: Styles route lines.
- New Color Style: Sets a color for a waypoint icon, line, or region.
- New Variable Color Style: Sets a color based on a numeric range.
-
Define the rule:
- Condition Type: A single condition, or a composite condition (all must match, or at least one matches).
- Attribute: The attribute the rule checks.
- Comparator: How the rule compares values to satisfy the condition.
- Value: The value to compare against, depending on the comparator (for example, "Is Equal To" a value).
- Style: The style to apply to objects that satisfy the rule. The example below uses an icon style.
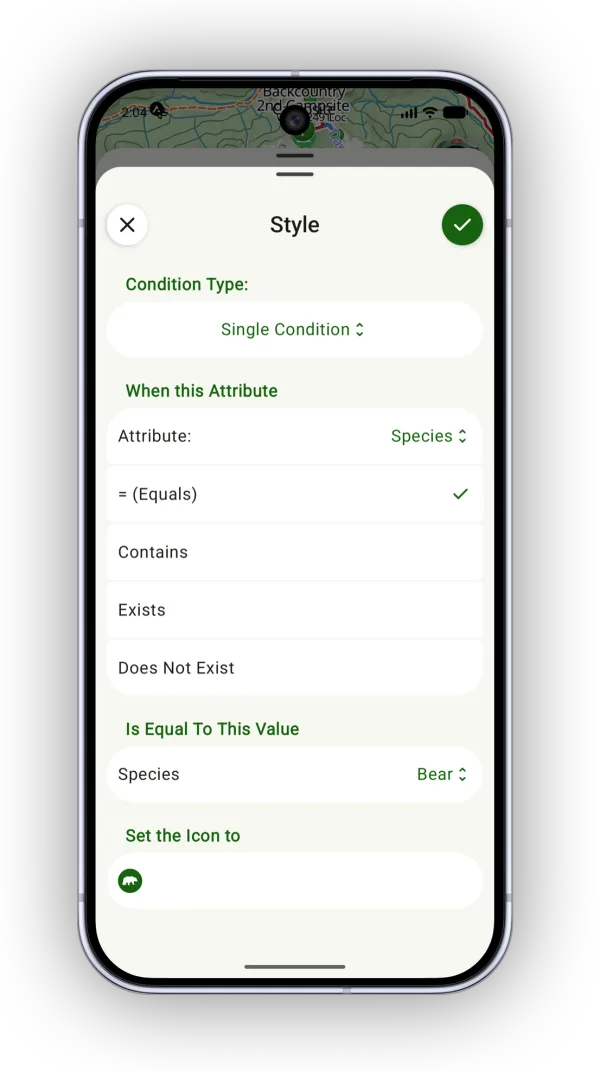
Shown on Android — iPhone looks slightly different.
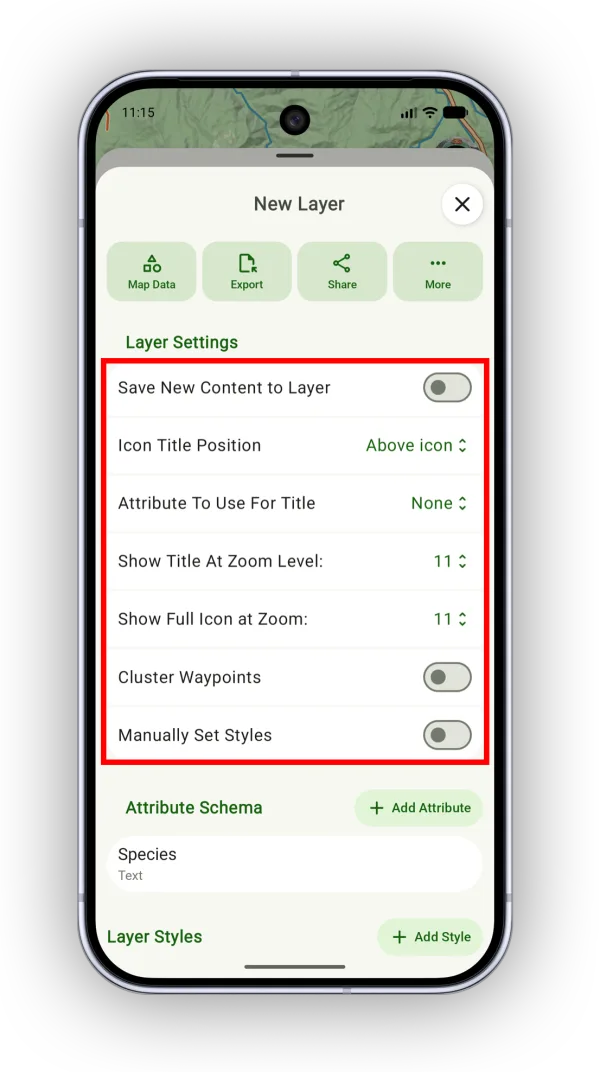
Layer settings
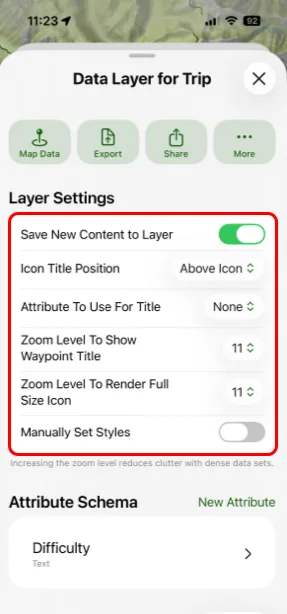
The settings at the top of a data layer control how it behaves:
- Save New Content to Layer: New waypoints, routes, and regions you create are added to this layer automatically, and you're asked to set their attributes.
- Icon Title Position: Where waypoint titles appear for the layer.
- Attribute To Use For Title: Which attribute waypoints show as their title. The default, None, uses each waypoint's own title. Switch it to quickly see different attribute values on the map.
- Show Title At Zoom Level: The zoom level at which waypoint titles appear.
- Show Full Icon at Zoom: The zoom level at which waypoints show a full-size icon. Raising it helps tell icons apart in a dense data set.
- Cluster Waypoints: Groups nearby waypoints together.
- Manually Set Styles: Objects use their own styles and ignore the layer's style rules.
How to add data to a data layer
-
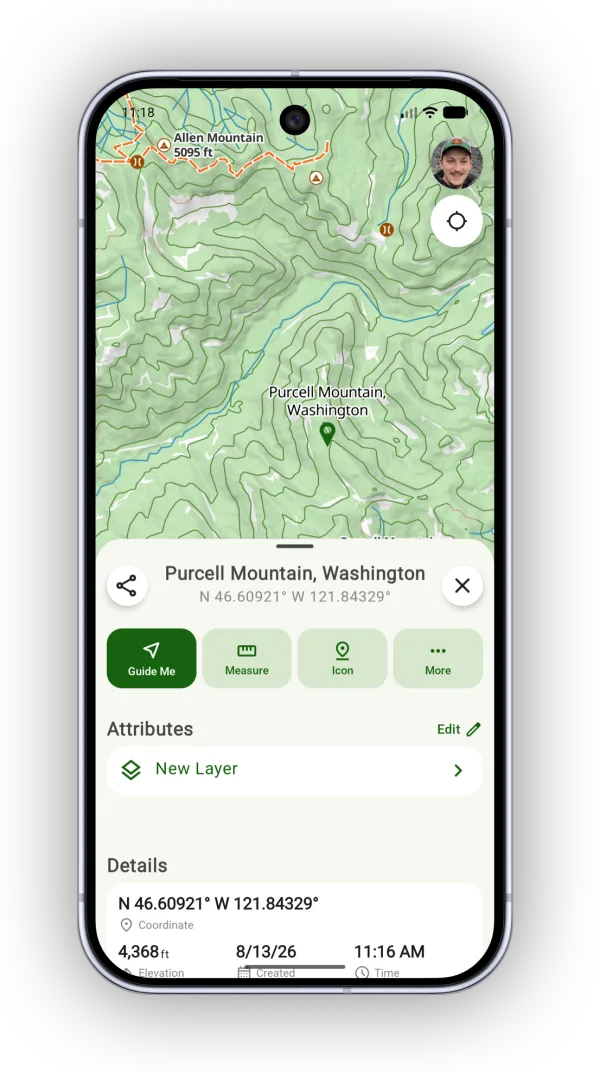
Automatically: With Save New Content to Layer on, anything you create is added to the layer, and Topo Maps+ asks you to set its attributes.
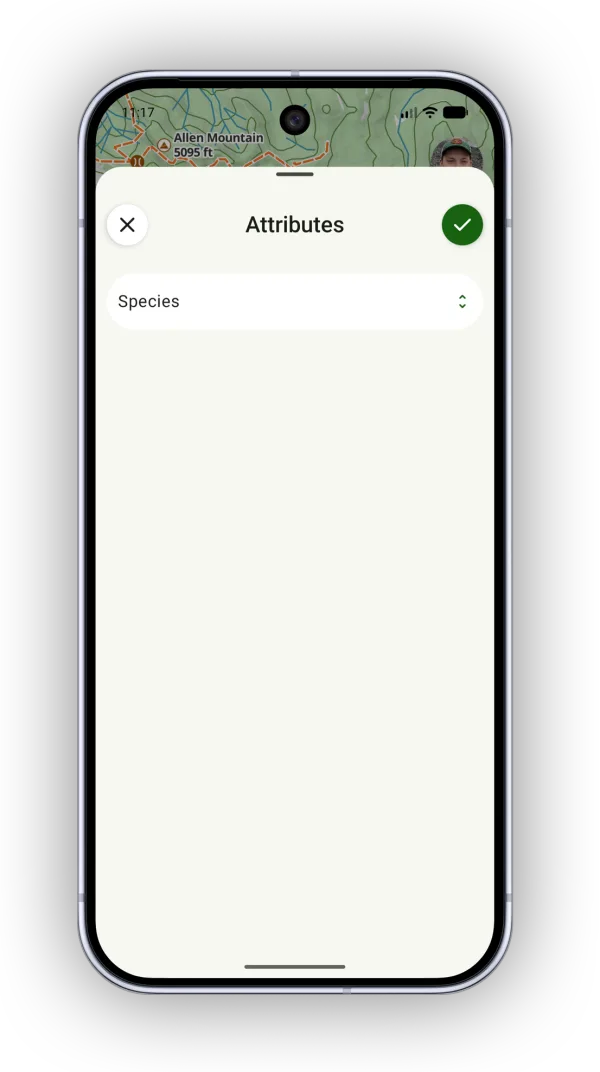
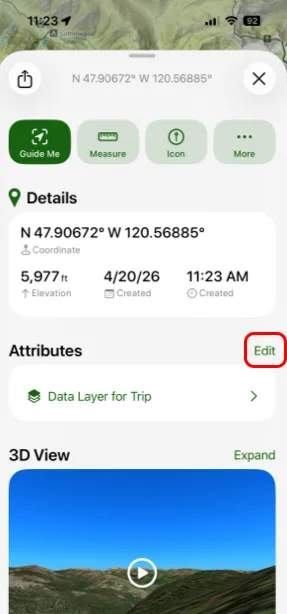
Shown on Android — iPhone looks slightly different. You can change the attributes anytime by tapping Edit next to Attributes on the object.
-
From the layer: In the data layer, tap Map Data, then tap Add.
-
From any object: Anywhere you can edit an object, choose to move it to a data layer.
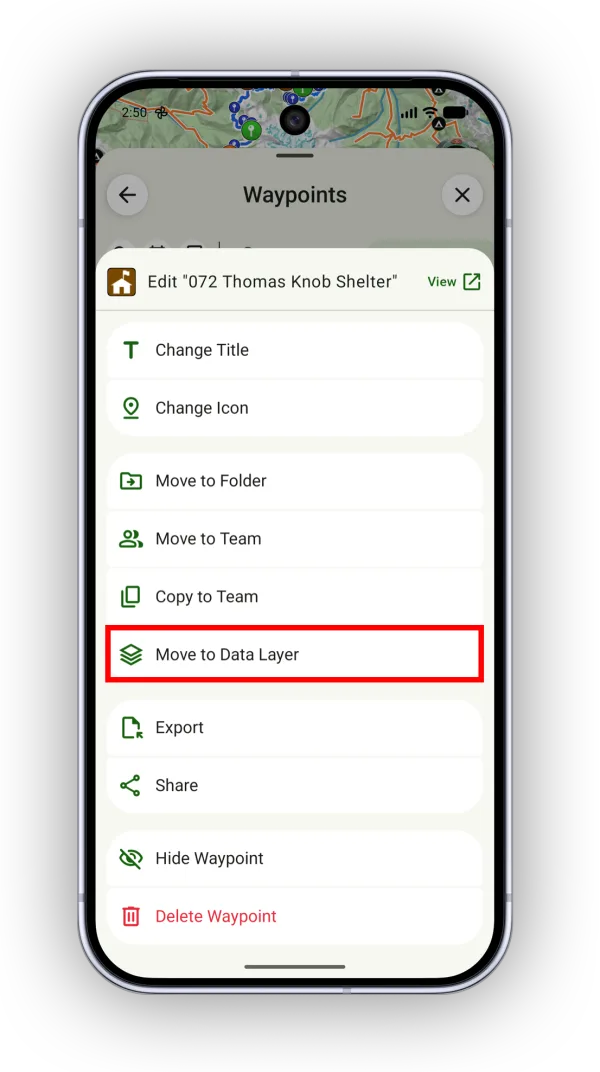
Shown on Android — iPhone looks slightly different.
Data layer groups
A data layer group lets several layers share the same attributes and styles.
-
Under Data Layers, tap Add, then tap New Data Layer GroupNew Layer Group.
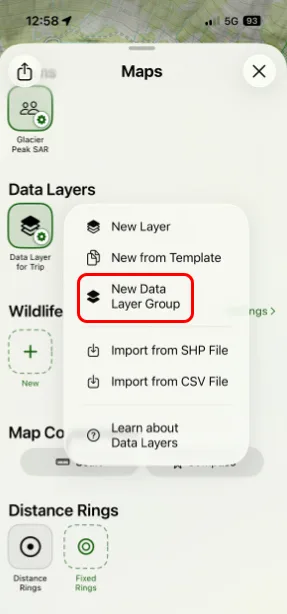
Shown on iPhone — Android looks slightly different. -
Give the group a name.
The group appears as its own section in the Maps panel. Add layers to it with the Add button in that section. Layers in a group take their attributes and styles from the group, not from their own settings. To edit the group, tap Settings in its section.
Updated October 7, 2026
More in Teams & Pro Tools
Still need help?
We’re a small team and we read every message. Email support@topomaps.co and tell us which device you’re on.